1. Make sure your hair is perfectly brushed through. 2. Divide your hair into two sections 3. Take a small strand from the back of one section and wrap it around in front to join at the the back of the other section. 4. Tightly pull this so it becomes part of the new section 5. Take a different strand from the second section and bring it over to join the back of the first secion and repeat all the way down your hair. 6. For a natural messy look gently tease the fishtail especially at the top of the braid and spray with volumising hairspray. Or keep it simple and sleek. 7. Here is a video from Zoella to see the braiding in action!
1. Find the right colour for you There are some good online quizzes to take... -Garnier Hair Colour Quiz - Olia Colour Quiz 2. Choose a good quality dye with nourishing conditioner eg. Garnier Olia, L'oreal Casting Creme Gloss, Garnier Nutrisse or Clairol Nice and Easy 3. Test it. Many are tempted to miss out this step but you must test the dye first because allergic reactions to dye can be VERY nasty. 4.Set up with an old towel around your shoulders and old clothes in case of any spillages and some clips and a comb if you want to do your hair in sections. 5. Mix the colour and the developer together, don't accidentally add the conditioner to the colour (a common mistake) 6. Put on plastic gloves which should be provided in the kit. Especially if bleach is involved! 7. Start applying the dye from root to tip and be careful to ensure all layers and all parts of the hair are covered in dye 8. If you want to do highlights, I would recommend a highlighting cap. Place it on your head securely and pull through sections of hair and just highlight the hair poking through the cap. Or you can carefully highlight only the bits you want and then wrap these strands in aluminium foil while they develop. 9. Leave the dye on for the allocated time but check after a while and if it;s still not the colour you want you can leave it on longer, but not for too long! 10. Rinse your hair thoroughly in the shower, leave your gloves on and if you have used a cap leave the cap on for this. Then add the conditioner provided but don't use shampoo the first time you rinse your hair after dying. 11. If you are not happy with your result, do not do it again immediately. Wait at least a week to give your hair a chance to recover a bit and by then you might even like it. If you do it again immediately it is likely to go wrong and this is when you can be left with bright orange stripes or similar.
Going on some amazing beach holiday this year or just want to pretend? Want the perfect beachy waves to match? Here's how. First of all, unless you're blessed with naturally beautiful blonde highlights, you're going to want to add some colour to your hair. I did my highlights at home and although it did take three attempts to get it how I wanted, it worked well and wasn't too costly. Also t probably didn't work well enough for me the first and second times because of my over-cautious and perfectionist nature. Anyway..
I would recommend two highlighting kits: -Garnier nutrisse multi-lights kit
-L'Oréal Perfect Blonde Crème Highlight Kit
They are both simple easy to use highlighting kits with very nourishing conditioners.
You could also use any normal blonde dye of your choice.
For a full how to dye your hair guide visit my other post for that. This is just a brief guide for the specifics of beach hair.
Work out in the mirror where you want your highlights, how high up the hair you want them to be and how many you want. Although normally thin highlights are recommended, for beach hair you can dare to take bigger sections for a bolder look. I would recommend starting roughly halfway up the hair but with some longer and some shorter highlights. Leave them on for a varied amount of time to achieve different shades of blonde. These highlights are not meant to be perfectly even, they should be random, as though they have been caused by the sun. If you want more of an ombre look simply apply most of the dye to the ends of the hair and less further up.
Once you've got the colour right, it's time for the styling. I try to avoid curling irons and straighteners as much as possible in the summer so I achieve beachy waves with out any heat damage.
Wash your hair in the evening before you go to bed. With your newly highlighted hair you may want to try specialised shampoos such as...
Then, towel dry your hair briefly before thoroughly brushing/combing through. If you want you can then add a serum or oil to add shine and make your hair feel softer. I recommend....
-Elvive extraordinary oil
-Tresemme liquid gold
Then separate your hair into two sections and create two fishtail plaits. fishtail plaits give much better curls than normal plaits but you can of course experiment with the amount you do and can even just do one plait at the back if you find that gives you sufficient waves. If you're not sure how to fishtail plait, there are lots of simple tutorials on youtube. It is a very easy braid once you know how to do it.
Now you can sleep.
In the morning, check your hair is completely dry and if it isn't; briefly use a hairdryer while your hair is still in the plaits. Then gently take out the plaits and carefully comb your fingers though your hair, do not use a brush, this will make your hair big and fly-away.
Then add some sea salt spray or a similar spray that adds texture to your hair. Spray this in and scrunch up your hair.
Then add some mousse and repeat the scrunching, this will help the waves stay in place for the whole day.
Finally spritz some hairspray all over your head and viola! You're good to go!
Yet Another Book Review! Title: Things I know about love Author: Kate Le Vann Genre: Romance
<<<MAY CONTAIN SPOILERS!!>>>
This book was fairly simple and easy to read. It had a good, dramatic start which makes it much easier to get into the book. It was written in an informal, chatty style of writing as it was written as a diary/blog. The book was about an 18yr old girl called Livia that had been diagnosed with leukemia when she was 13. She had never been away from home or her mother but now that she was finally pretty much clear of her illness, she wanted to visit her brother Jeff in America. Livia writes about her previous relationships and what she has learnt from them. She writes a list called "Things I know about love" and as the story progresses, she adds to the list and changes it. The first time Livia writes the list, all it has on it is: "Nothing that happens between two people is guaranteed to be private." She adds things such as: "I don't know if you ever get over having your heartbroken" and then later on in the book this changes to: "Hearts don't really get broken, but if you practise too hard with them, they can get quite hurt. It feels like they won't get better, but they do." The final list simply says "1.Being 2. In 3. Love 4. Is 5. The 6. Best 7. Thing 8. In 9. The 10. World."
<<<< SPOLIER ALERT!! >>>>> Livia falls in love with her older brother's friend and he begins to write his own blog which is simply about Livia. When Adam writes a blog it is written in a different font so that the reader can tell who has written it. Adam takes Livia on a date to New York but Livia begins to feel unwell and then suddenly she falls unconscious and has to be rushed to hospital. Her Mum flies over from England because the Leukemia has come back. Adam buys Livia the expensive pair of shoes that she admired on their first date. Then Adam writes the last part of the story in which Livia dies. I was really shocked when Livia died because every thing seemed so happy and perfect and the book came to a sudden end. This was good because it emphasised the way in which Livia was as happy as can be and then suddenly it was all over. I read this book really quickly as I really enjoyed it. However I think to appreciate the style of this book the most, you need to read a variety of books and I will definitely read some slightly more challenging books as well.
Another Book Review! Title: Sleeping Arrangements Author: Sophie Kinsella writing as Madeline Wickham Genre: Romance Sleeping Arrangements is about two families who go on holiday to Spain after being promised the use of a fabulous villa by their "friend" Gerard. However when they arrive they find that Gerard has double booked the villa and the two families are both there a the same time. <<<MAY CONTAIN SPOILERS!!!>>> One Family consists of a workaholic named Hugh who hardly ever spends time with his family and feels like he doesn't know his children. His Wife is a glamorous stay at home mother, called Amanda, and their children are called Beatrice and Octavia. They also bring a young Nanny called Jenna who keeps making the situation better then worse again with her "jokes." The Other Family is a women named Chloe who had a son named Sam (age 16) when she was 18, her Partner Philip and their 8yr old son, Nat. Philip is pretty sure he is about to be made redundant so Chloe wants them to have a holiday without thinking about work. Philip and Amanda think they are just two families that have never met with no connections but Hugh and Chloe used to be lovers when they were 20. Hugh panicked and left Chloe when she showed him her baby, Sam. Chloe and Hugh sleep together and Hugh wants to marry Chloe and start over again but they soon realise that they love their families too much to tear their lives apart. However that is not the only connection the two families have. Hugh works for the bank that is about to take over Philip's bank and therefore make Philip redundant. Another little story running along the side is Sam and Jenna's summer Romance. found this book easy to read and enjoyable but it definitely seemed to be written as a light holiday read. The book was a mixture of romance, comedy and family issues. It felt like the book was covering about 2 weeks of their holiday but at the end I found that it was written about three days so it was very detailed for a 3 day story! I would recommend this to someone that would like a bit of light relief on holiday. I would rate this book 3.5/5.
Book Review! Title: The Last Song Author: Nicholas Sparks Genre: Romance
I Watched this film and I really liked it so I wanted to read the book. Lots of people had recommended it and I usually prefer the book to the film anyway. I also watched Dear John which was by the same author. I was amazed by how similar these two films/stories were.
<<<MAY CONTAIN SPOILERS!!>>>
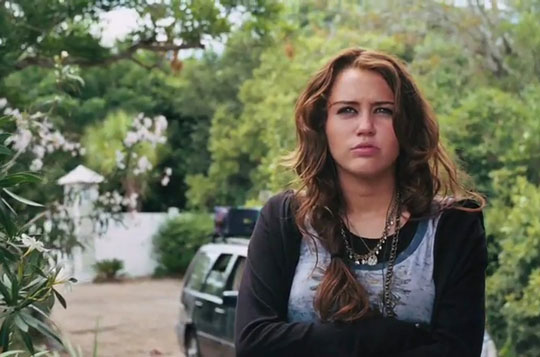
The Last Song is about a teenage girl who hasn't spoken to her father for 3 years but then spends the summer with him. She is miserable, grumpy, selfish and tries to spend as little time with her father as possible. Then She falls in love with a popular, rich, beach volleyball player/ aquarium volunteer/ mechanic called Will. Everything is going well until she finds out her father has cancer and the main reason that he has brought his children, Ronnie and Jonah to his home to say goodbye to them. Jonah has been working with his father, Steve, on a stain glass window for the church, that Steve believed he burnt down, all summer. When Ronnie arrived, she began to hang out with some rebellious fire throwers, who's leader was called Marcus. Blaze was Marcus' girlfriend but Marcus began to fancy Ronnie. Blaze thought Ronnie was trying to steal Marcus from her so she stole CDs and put them in Ronnie's bag which meant Ronnie would end up in court. . . again. Will and his friend Scott go to Steve to tell him that it was them and Marcus' gang that were to blame for the Church fire. Ronnie found out and was furious because her Dad had been living with the guilt and rumours that he had burnt it down because he was practising the piano when it happened. She Told Will that she never wanted to see him again so he left for university. On the day of Steve's funeral Ronnie played a piano piece that her and her Father had been working on. Music was Ronnie and Steve's connection and Steve wanted to be a concert pianist but never quite made it so he wanted his daughter to make it. Ronnie hadn't played for 3 years but she began to play again when she found out about her father's illness. Will turned up for the funeral and he decided he would move to a university nearer to Ronnie and he said it would be great if they could meet up one day, when she's ready. I normally hate endings like that, which aren't all wrapped up but in this book I think the unknowing and the possibilities of what might happen next worked really well. This book was about love, family relationships and trying to make the most out of life. I really enjoyed this book so I will probably read Dear John and the notebook as well because Nicholas Sparks seems like a very good author. I would give this book 4.5/5
There are ways to lighten hair without going to a salon or buying over the counter hair bleach which is very damaging for your hair. There are no natural ways to make black hair turn blonde.... but there are definitely ways to lighten hair a few shades without dye.
1. SUN! Staying out in the sun's rays lightens hair and gives natural highlights. The sun bleaches the melanin in your hair giving you lighter hair. It won't dry out your hair and is the safest way to naturally lighten hair.
2. Honey.
This method works due to the natural hydrogen peroxide that is found in honey. For best results...
-Pour 1/3 cup of honey into a bowl. - Add a 1/4 cup of your favorite conditioner and put it in the bowl with the honey. -Combine the mixture -Apply the mixture to damp hair and cover with the shower cap. After this mixture has been sitting on your hair and scalp for 8 hours, you can take the shower cap off and wash the mixture out with water.
The overall outcome of this process will have your hair looking and feeling silky, shiny, and healthy. It will also have your hair looking a little bit lighter in a natural, non-dramatic way. However this method takes a while, and you may have to leave the treatment on longer, or do it multiple times to get your desired outcome. I tried honey as a lightener on my medium-light brown hair and although I was not blonde by the end of it, my hair was certainly lighter and it helped to enhance highlights and of course made it feel very soft and healthy.
3. Lemon. Lemon juice will lighten your hair gradually but definitely works best on lighter shades of hair or light highlights. I would recommend using lemon juice if you have blonde hair that you want to enhance rather than for lightening dark hair. For best results... - Mix freshly squeezed lemon juice (3-4 lemons) warm water together in a cup and then pour the mixture into a spray bottle. -Spray the mixture onto your hair until your hair is damp. Or.. -Combine the lemon juice and the conditioner in a small bowl. -Place a towel around your shoulders. Scoop the mixture out with your hand and rub it over your hair. Then, use a wide-tooth comb to comb the lemon juice and conditioner through your hair. Then...
-Sit out in the sun for 1 to 2 hours. Take a shower and apply a deep conditioner to your hair Repeat the process weekly until your hair turns the colour that you want.
4. Chamomile Tea. Another natural easy method to try for lightening hair. For best results...
-Boil a pot of water and add a chamomile tea bag and leave it for about 30 minutes.
-Then put the pot on the counter to cool off. and squeeze the tea bag a few more times just to get all the juice out.
-Take the pot to a sink and either dunk your hair into the pot of smother it with the tea using your hands.
-Put a shower cap on and leave it for a couple of hours or longer if you wish.
-Then wash your hair as usual.
Chamomile tea will leave your hair more shiny, more healthy, and lighter. The results are amazing especially since chamomile is so cheap to buy.
So what are you waiting for. Try one of these cheap, natural lightening methods that also make your hair healthy at the same time! Your results won't be drastic but these methods are perfect for subtle lightening for summer.
Vaseline is the classic lip therapy which dates right back to 1872, it still works amazingly and is probably my favourite of all. It protects your lips and creates a moisturising layer. Personally I always use "rosy lips" because i much prefer the texture, scent and colour. I personally don't like the way original vaseline makes your lips look so I tried "rosy lips" and I love it even more. It makes your lips look a very nice natural pink colour, smells good and still does amazing things to dry lips! I always carry a tin of vaseline everywhere with me. 2. Carmex - £2.69
Another classic, invented in 1936. Carmex contains menthol which causes a tingly, cool, minty sensation on the lips. Some people like this whilst others hate it. I personally like the sensation. it also contains lots of petroleum jelly so has a similar texture to vaseline. Personally, although it works great, I am not keen on the taste of original carmex so I would recommend trying a flavoured one such as cherry, mint or strawberry. I put this on at night and in the morning my lips feel much smoother and softer.
3. Chapstick - £1.05
Chapsticks are cheap, smell great, and help prevent chapped lips well. Chapsticks contain less petroleum jelly so have a firmer texture which lots of people prefer. They prevent chapped lips due to the smooth coating they provide but they do not cure lips as well as some of the others, they do not cure previously damaged lips as well as some others. They are fun, tasty lip balms which are great to have.
4. Eos - £5.99
Eos lip balms are 95% organic, 100% natural organic lip balm that's petrolatum & paraben free. They are very attractive looking in small, round, colourful containers. They also come in lots of lovely flavours including, strawberry, lemon and summer fruit. They have a very nice texture which slides onto lips and protects them.
5. Burt's Bees - £3.69 Burt's bees is another organic brand of lip balm which appeals to many people. some of them contain menthol similar to carmex to give that tingly sensation. Burt's Bees also do tinted lib balms which are more like lipsticks that nourish your lips at the same time. These lip balms contain more of the healing elements than many others which just protect. They’re highly moisturizing, go on smooth and are long-lasting
6.Nivea - £1.65
These are great everyday lip balms to keep in your pocket to quickly apply at any point. These lip balms work great for under and above lip sticks. They also have some lip balms which also look good such as the nivea pearl and shine. This make your lips a nice subtle shiny colour but I don't feel like it moisturises lips that well.
Hi! I had to dress up in 70s style clothes and makeup for a school production and I got quite interested in it so I decided to blog about it. So here we go!
Makeup
Eyebrows should be quite thick and dark
Eyeliner needs to be quite thick with black first and then bright blue or green eyeliner on top.
Eyeshadow needs to be a very bright block colour. Greens and blues are the best
Lashes should be big and false!
Cheeks should be pink with a defined upwards line
Lips should have a pale frosted lip gloss. If you use darker lipstick your look will be more 80s.
Hair
There are a quite a few different styles to choose from for 70s hair. The first is "Farrah Fawcett hair"
Her hair was always big fluffy and flicked. To get this look you need to use rollers. My advice with rollers would definitely be to get foam ones, put them in with wet hair and sleep in them over night. you may also want to use a curling wand to define the flicks. Finish with hairspray to hold curls.
Another look is centre parting and head band. A more 70s hippie look.
As Elle is demonstrating here.
Possibly with a bit of flower power!
My final look is BIG!
In the 70s girls wanted there hair to be big, Possibly with crimping as the picture on the left shows or bouffant like Cheryl's hair in this picture. So get out the volumizing products, blow dry your hair upside down and put it in rollers.


